I had a few projects floating around that I had wanted to build after I finished the DAC Controller. In the end, I settled on building a hybrid tube amplifier called the Starving Student Millet Hybrid (SSMH). The motivation was that I have yet to built a point-to-point, vacuum tube amplifier and I felt the desire to try my hand at building one. I didn’t feel comfortable jumping into a complicated build as my foray into something new. The SSMH has the benefit of a low part cost, hence “Starving Student.” A small investment translates to a low-risk first attempt at a point-to-point build which cemented my decision.
There was a big issue as the required 19J6 tubes are not in production anymore and the popularity of the SSMH depleted the remaining stock. There have been a few different attempts at replacing the 19J6 with different, inexpensive tubes. I have not heard any of these variations and can’t comment on them. But when I found a matched pair of 19J6 tubes on eBay a few months ago, I quickly snatched them up for use in this amp.
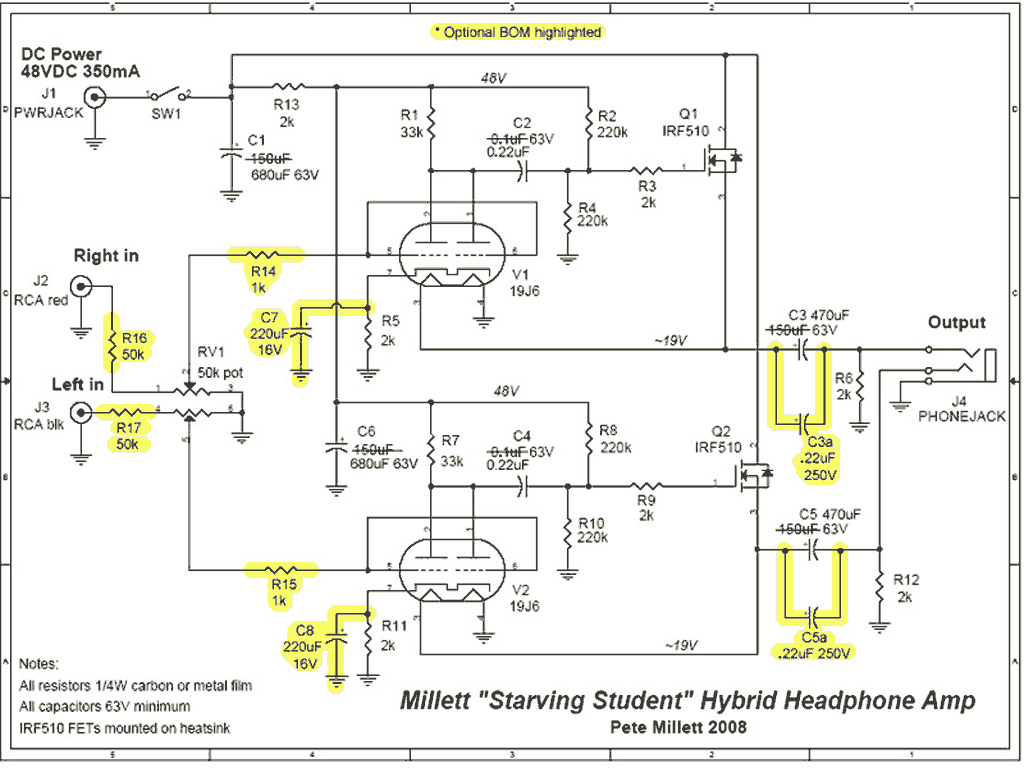
At one point, Doug Savitsky, of ECP Audio made some changes to the original circuit in the interest of improving sound quality. The changes are in yellow in the circuit I posted. Since the changes add very little additional complexity and cost to the project, I’ve decided to use the modified circuit in my amp.
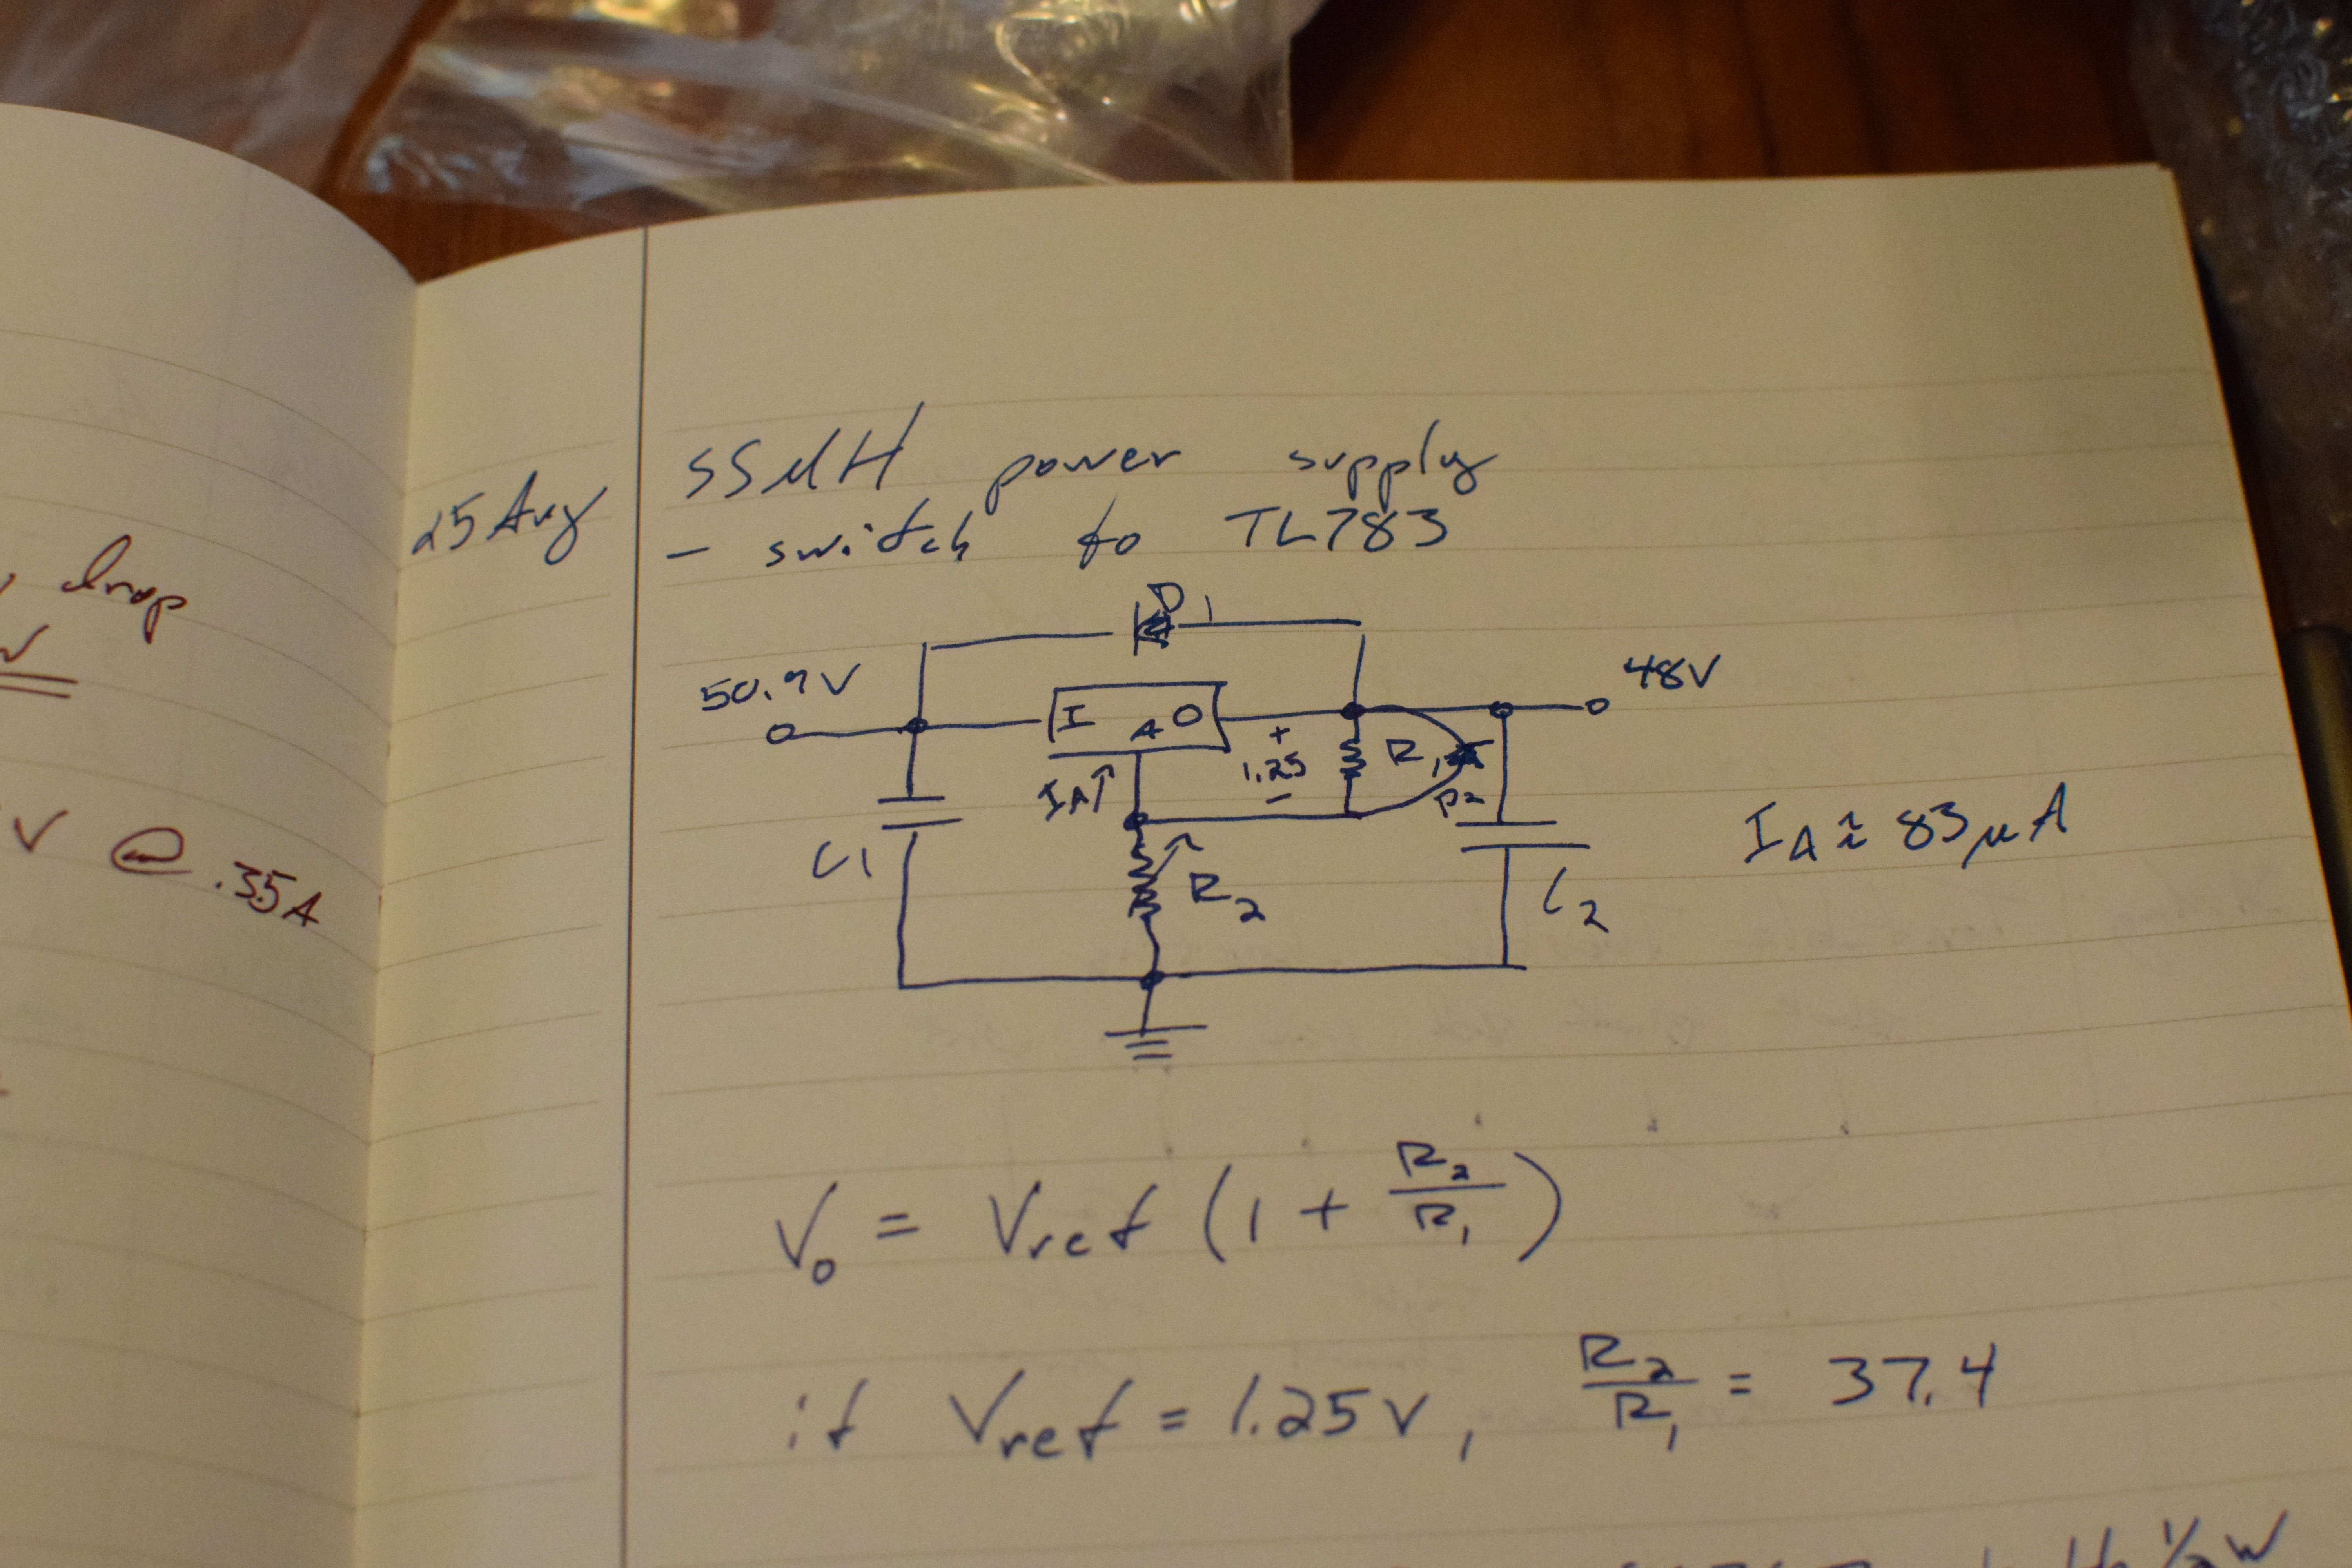
One thing I am deviating from is the use of a 48V “wall-wart” power supply called for in Pete Millet’s original write-up. I detest wall-warts on account of being bulky, ugly, never having quite the same performance as a purpose-built power supply and yet somehow generally being a bit more expensive in some cases. Thus, I have decided to design and build a simple, linear regulator-based power supply for my amp. I based the circuit on a TL783 adjustable regulator. It can supply plenty of current for the amp and is plenty simple. With the amount of current being drawn across the regular, it sits right at the edge of getting too hot and burning out. To combat that, I was already planning to use a large heatsink for the two MOSFETs in the amplifier output, my plan is to connect the TL783 to the same heatsink.
Other than the power issue, the project is fairly simple. I have all the parts picked out and already shipped to me. I picked up a pair of teflon tube sockets and a cheap aluminum heatsink off of eBay. I decided to case the amp in a Front Panel Express enclosure. I starting with laying out all the parts on a piece of paper to see how much real estate I needed. From there, I had the width and depth figured out. Height would have to wait until I finished the build and I planned the enclosure to allow that. To contrast completely with what I normally do, I am going with a silver enclosure for this build.
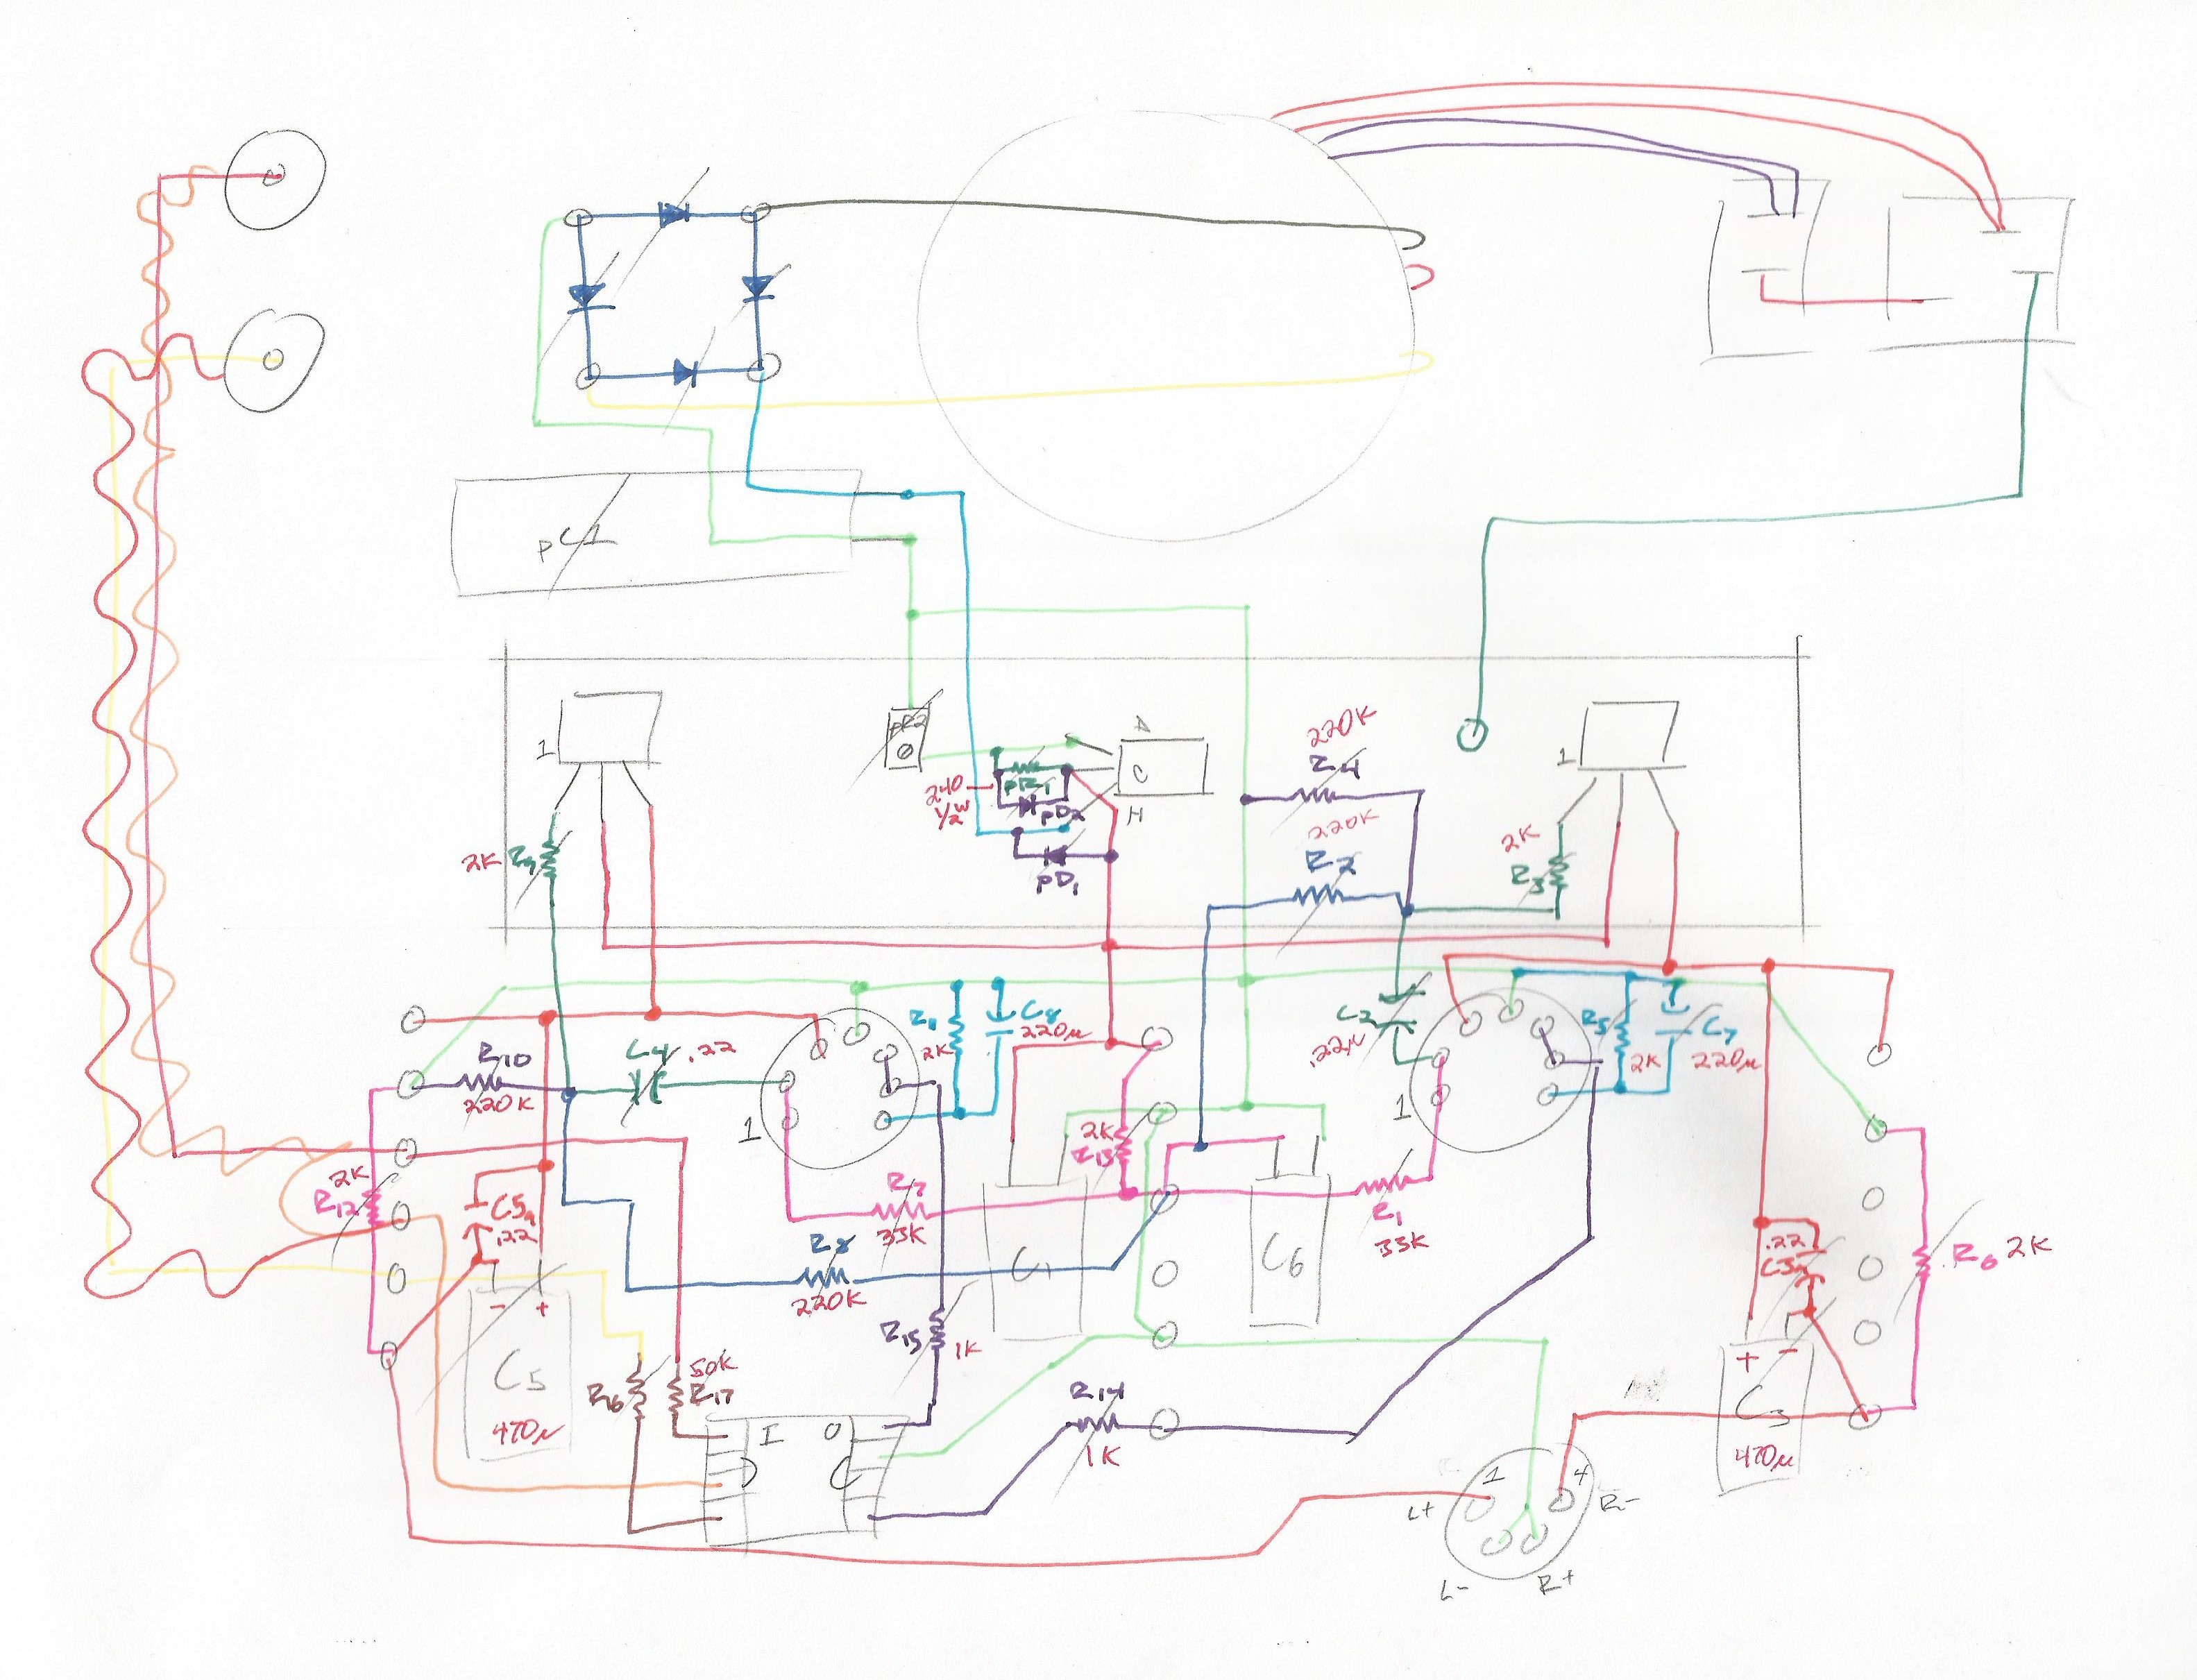
In planning out I figured out I would need a few sets of turret boards to make wiring much easier. I picked those up off of the eBay as well for very cheap. I spent the time with a set of colored pens to layout the circuit physically and make sure I had enough turrets to get everything done. As it turns out, I had more than enough. Hopefully, the final product will look considerably better than the mess of a diagram I made.
That is where I currently sit. I have the top panel in the mail currently. Every part will be attached to that panel and once I know it works, I will order the remaining 5 sides. Next time I will have some progress pics for you.