As much as I like to procrastinate, I did finally manage to test out the circuit I described last time. I put it all on a breadboard, tested it independently, tested it in the DAC itself, finalized the circuit board for it and ordered the board. Unlike the hen and her bread, I am willing to share the penultimate fruits of my labor.
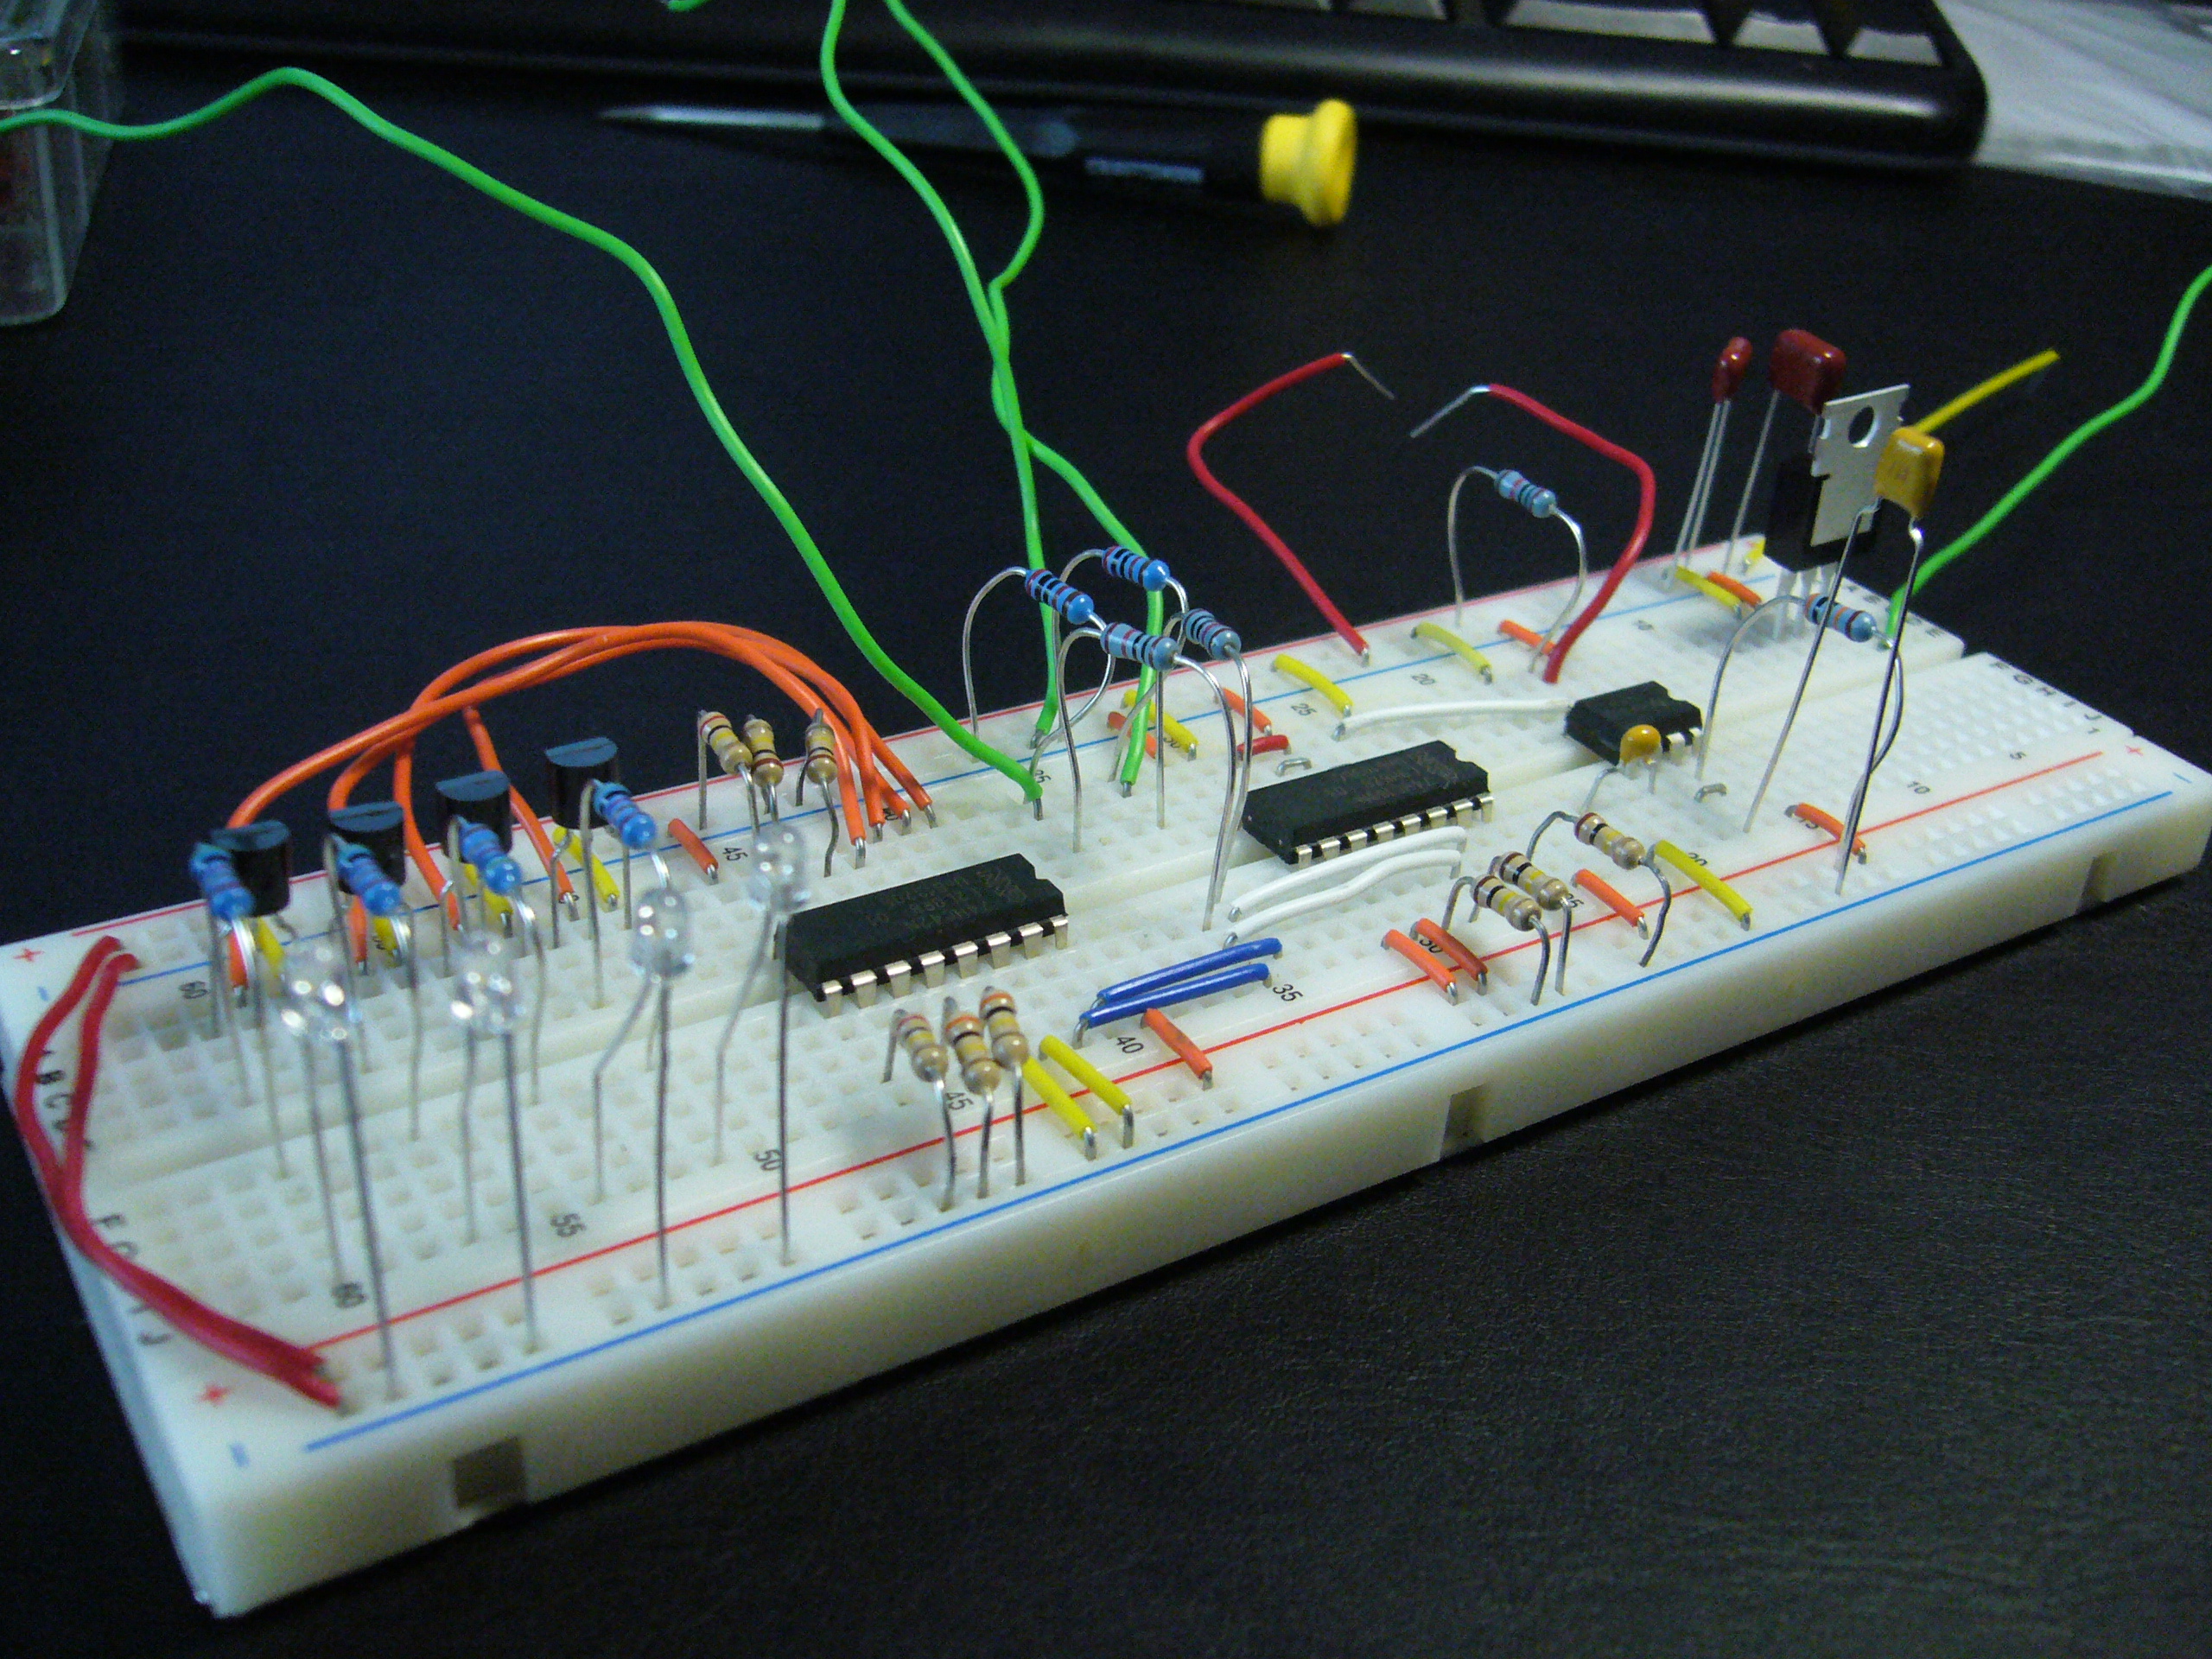
The act of putting together a circuit on a breadboard can be a very messy process. It helps having a circuit here that is not only fairly simple, but also has been broken up into functional blocks in my previous post. Putting it all together was just a matter of following the same thought train and making sure my wires were correct.
I did make a few changes in the interest of neatness, the main being that I did not use the resistor network and just used some individual resistors I had lying around. The other change is that I did not have a spare pushbutton switch to test with. I instead used two wires to build the most bare-bones switch possible. Functionally, the circuit is identical to the final product.
I had some spare parts lying around to build a rudimentary power supply to test the circuit before hooking it up to the DAC. It was a matter of putting it all on another breadboard, testing it to see if the voltage was correct and hooking it up to the power input of the controller circuit. Testing showed that the controller worked exactly as anticipated. The inputs were cycled correctly, the LEDs lit up in turn and the output signal voltages were right on the target 3.3V.
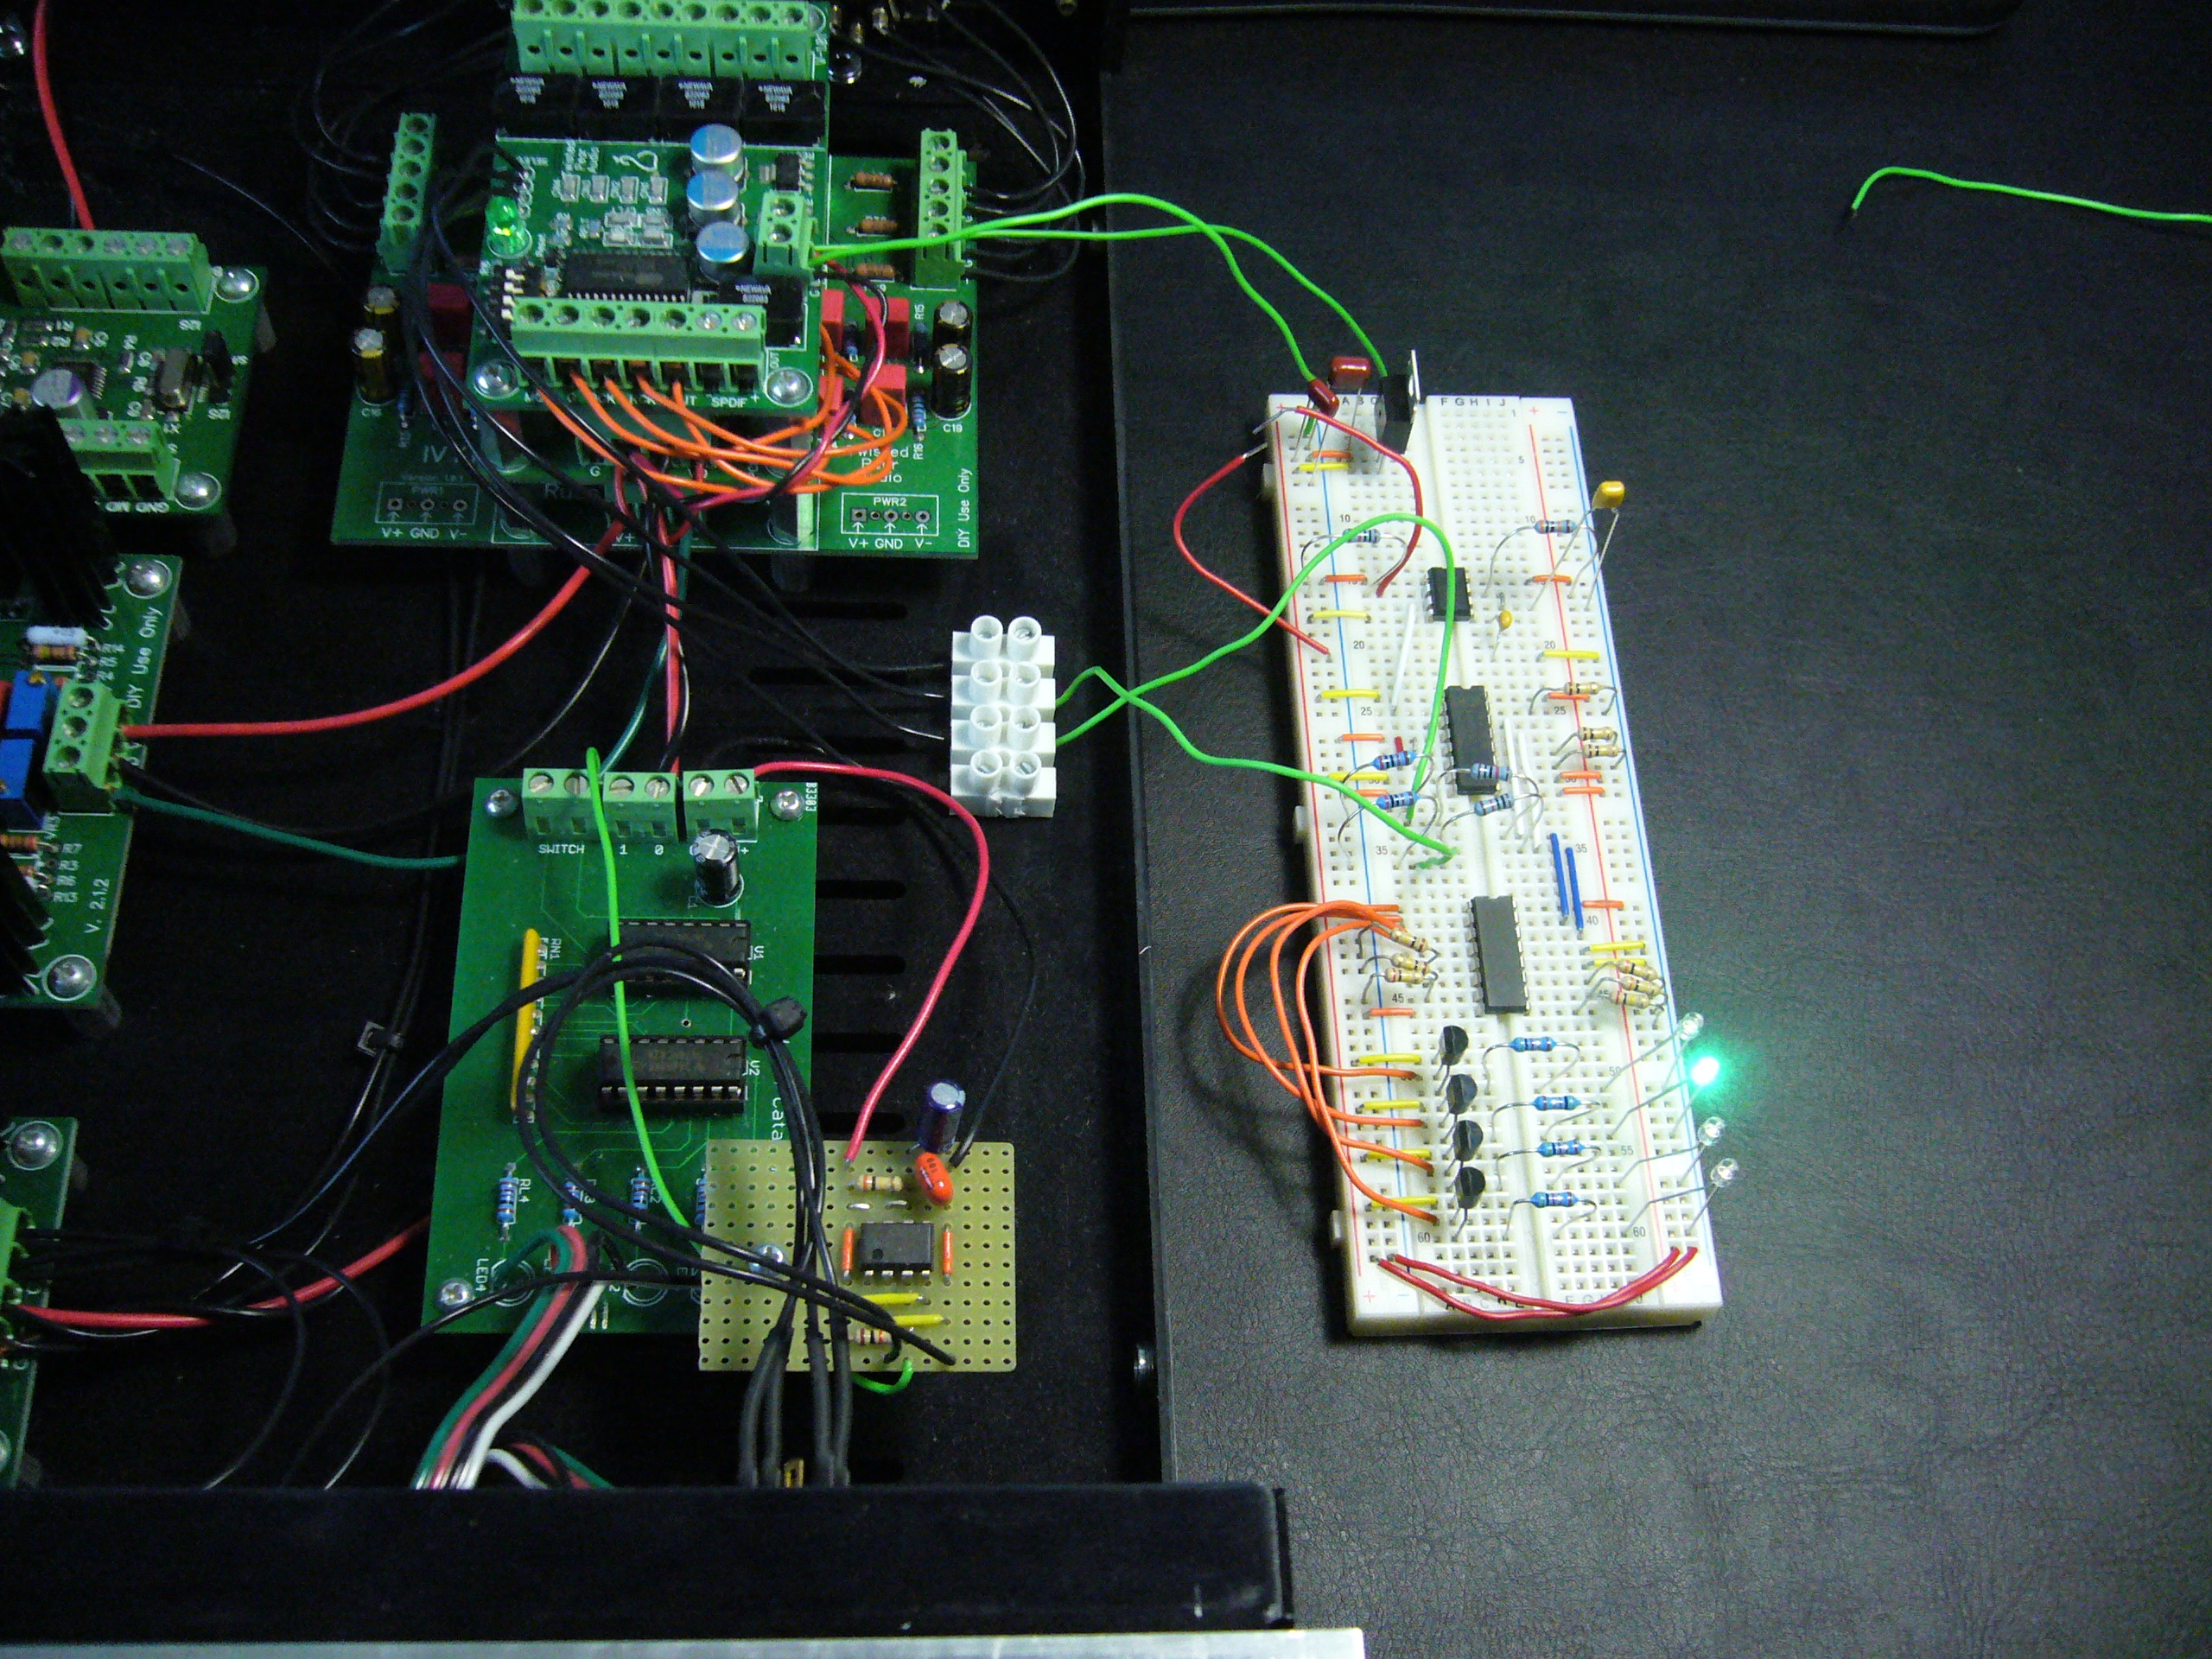
Hooking the controller up to the DAC was a matter of connecting to the same power supply the final board will use and connecting to the MUX itself. The switch was still left to be the bare wires. To make sure the inputs are being properly changed, I put music on one of the optical inputs and saw if I got any output when that input was selected. And I did. Everything worked out perfectly.
The next step is to have a proper printed circuit board made for the final circuit. Sure, I could use one of those nice solder-able prototyping boards but with a PCB, I can get everything onto a much more compact footprint. With companies popping up that specialize in small runs of custom PCBs, the cost is not too prohibitive.
I used Eagle to design my circuit and the beauty of using Eagle comes from once you have chosen the proper packages for all the parts and finished the circuit, one button will take you do the board designer with minimal effort. Using the software can be a little tricky but there are tutorials out there which I made considerable use of. Eagle has a sizable user base and any question you may have has probably already been asked.
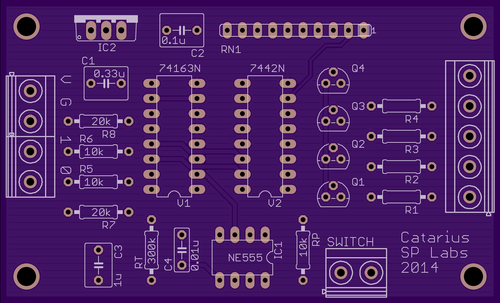
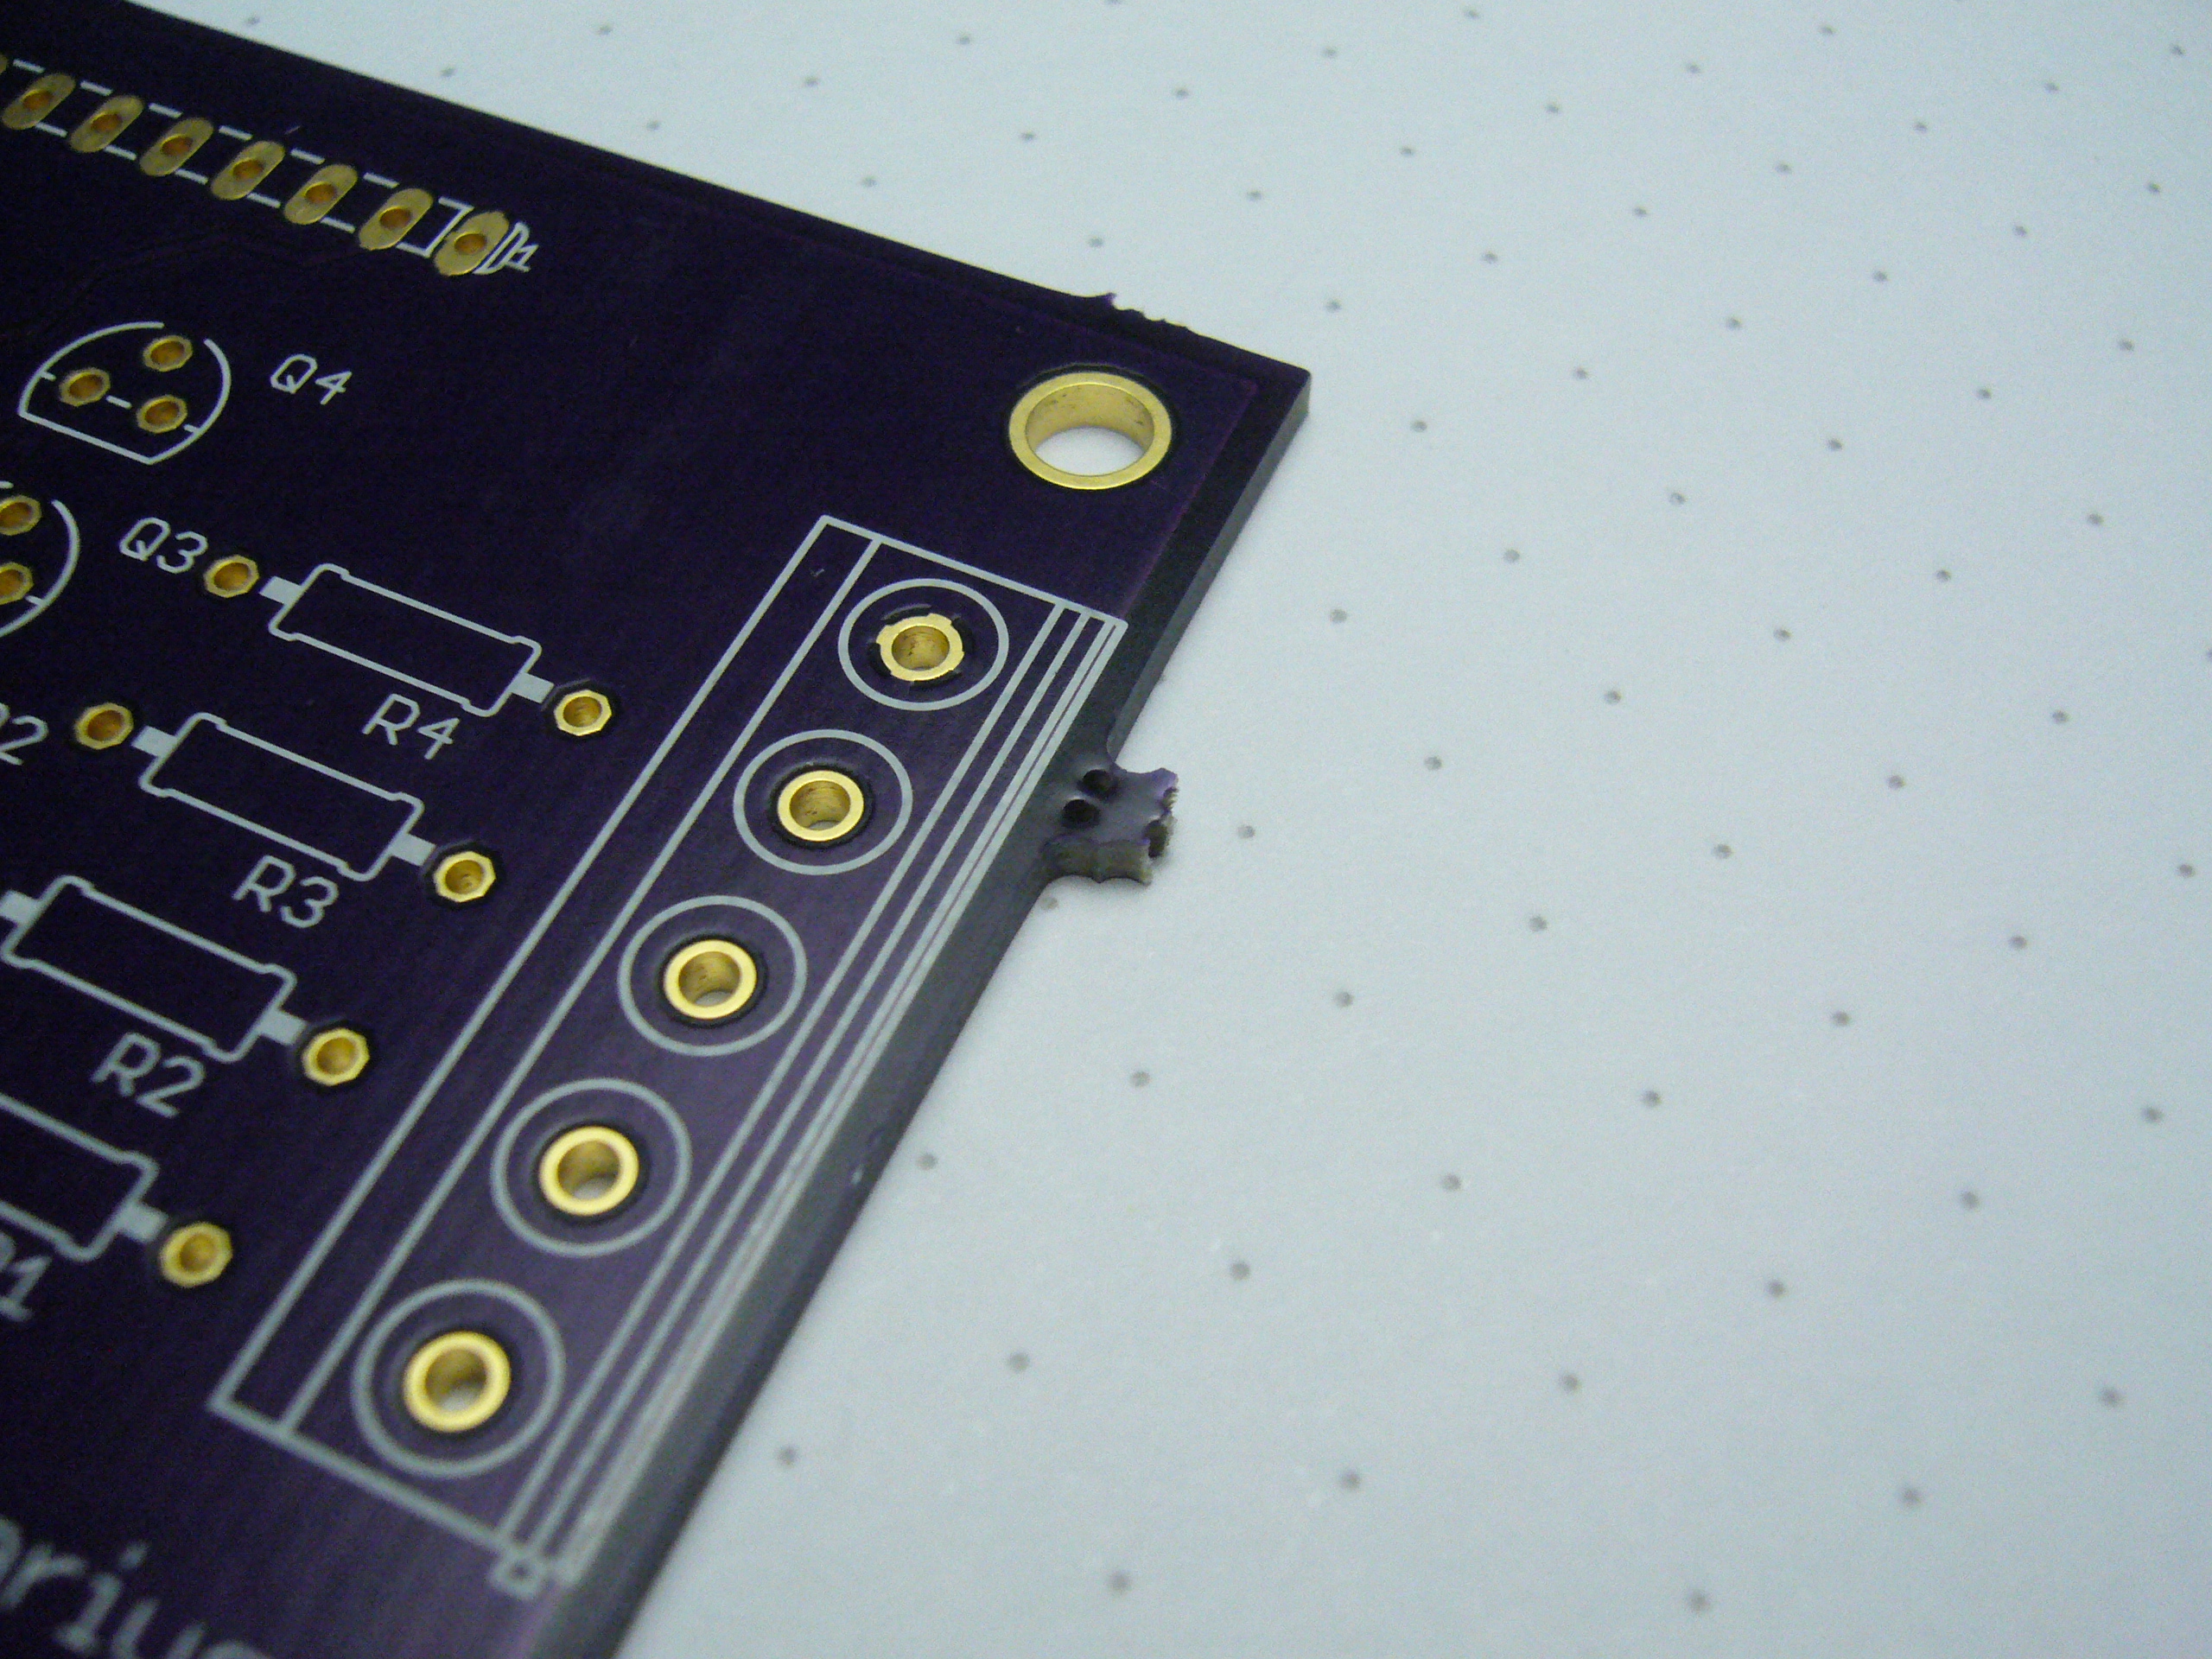
For a circuit this simple, a two-layer board was enough to wire everything up without having to use a via. The physical dimensions of the board are identical to the previous revision of the circuit so I can just drop it all in without drilling new holes. I also greater prefer Phoenix’s terminal blocks for all my projects which I used four of on this board. The LEDs will share a common ground terminal to reduce clutter. Getting the wires going to the resistor network all nice and parallel like shown took some swapping of what pin was connected where in the circuit.
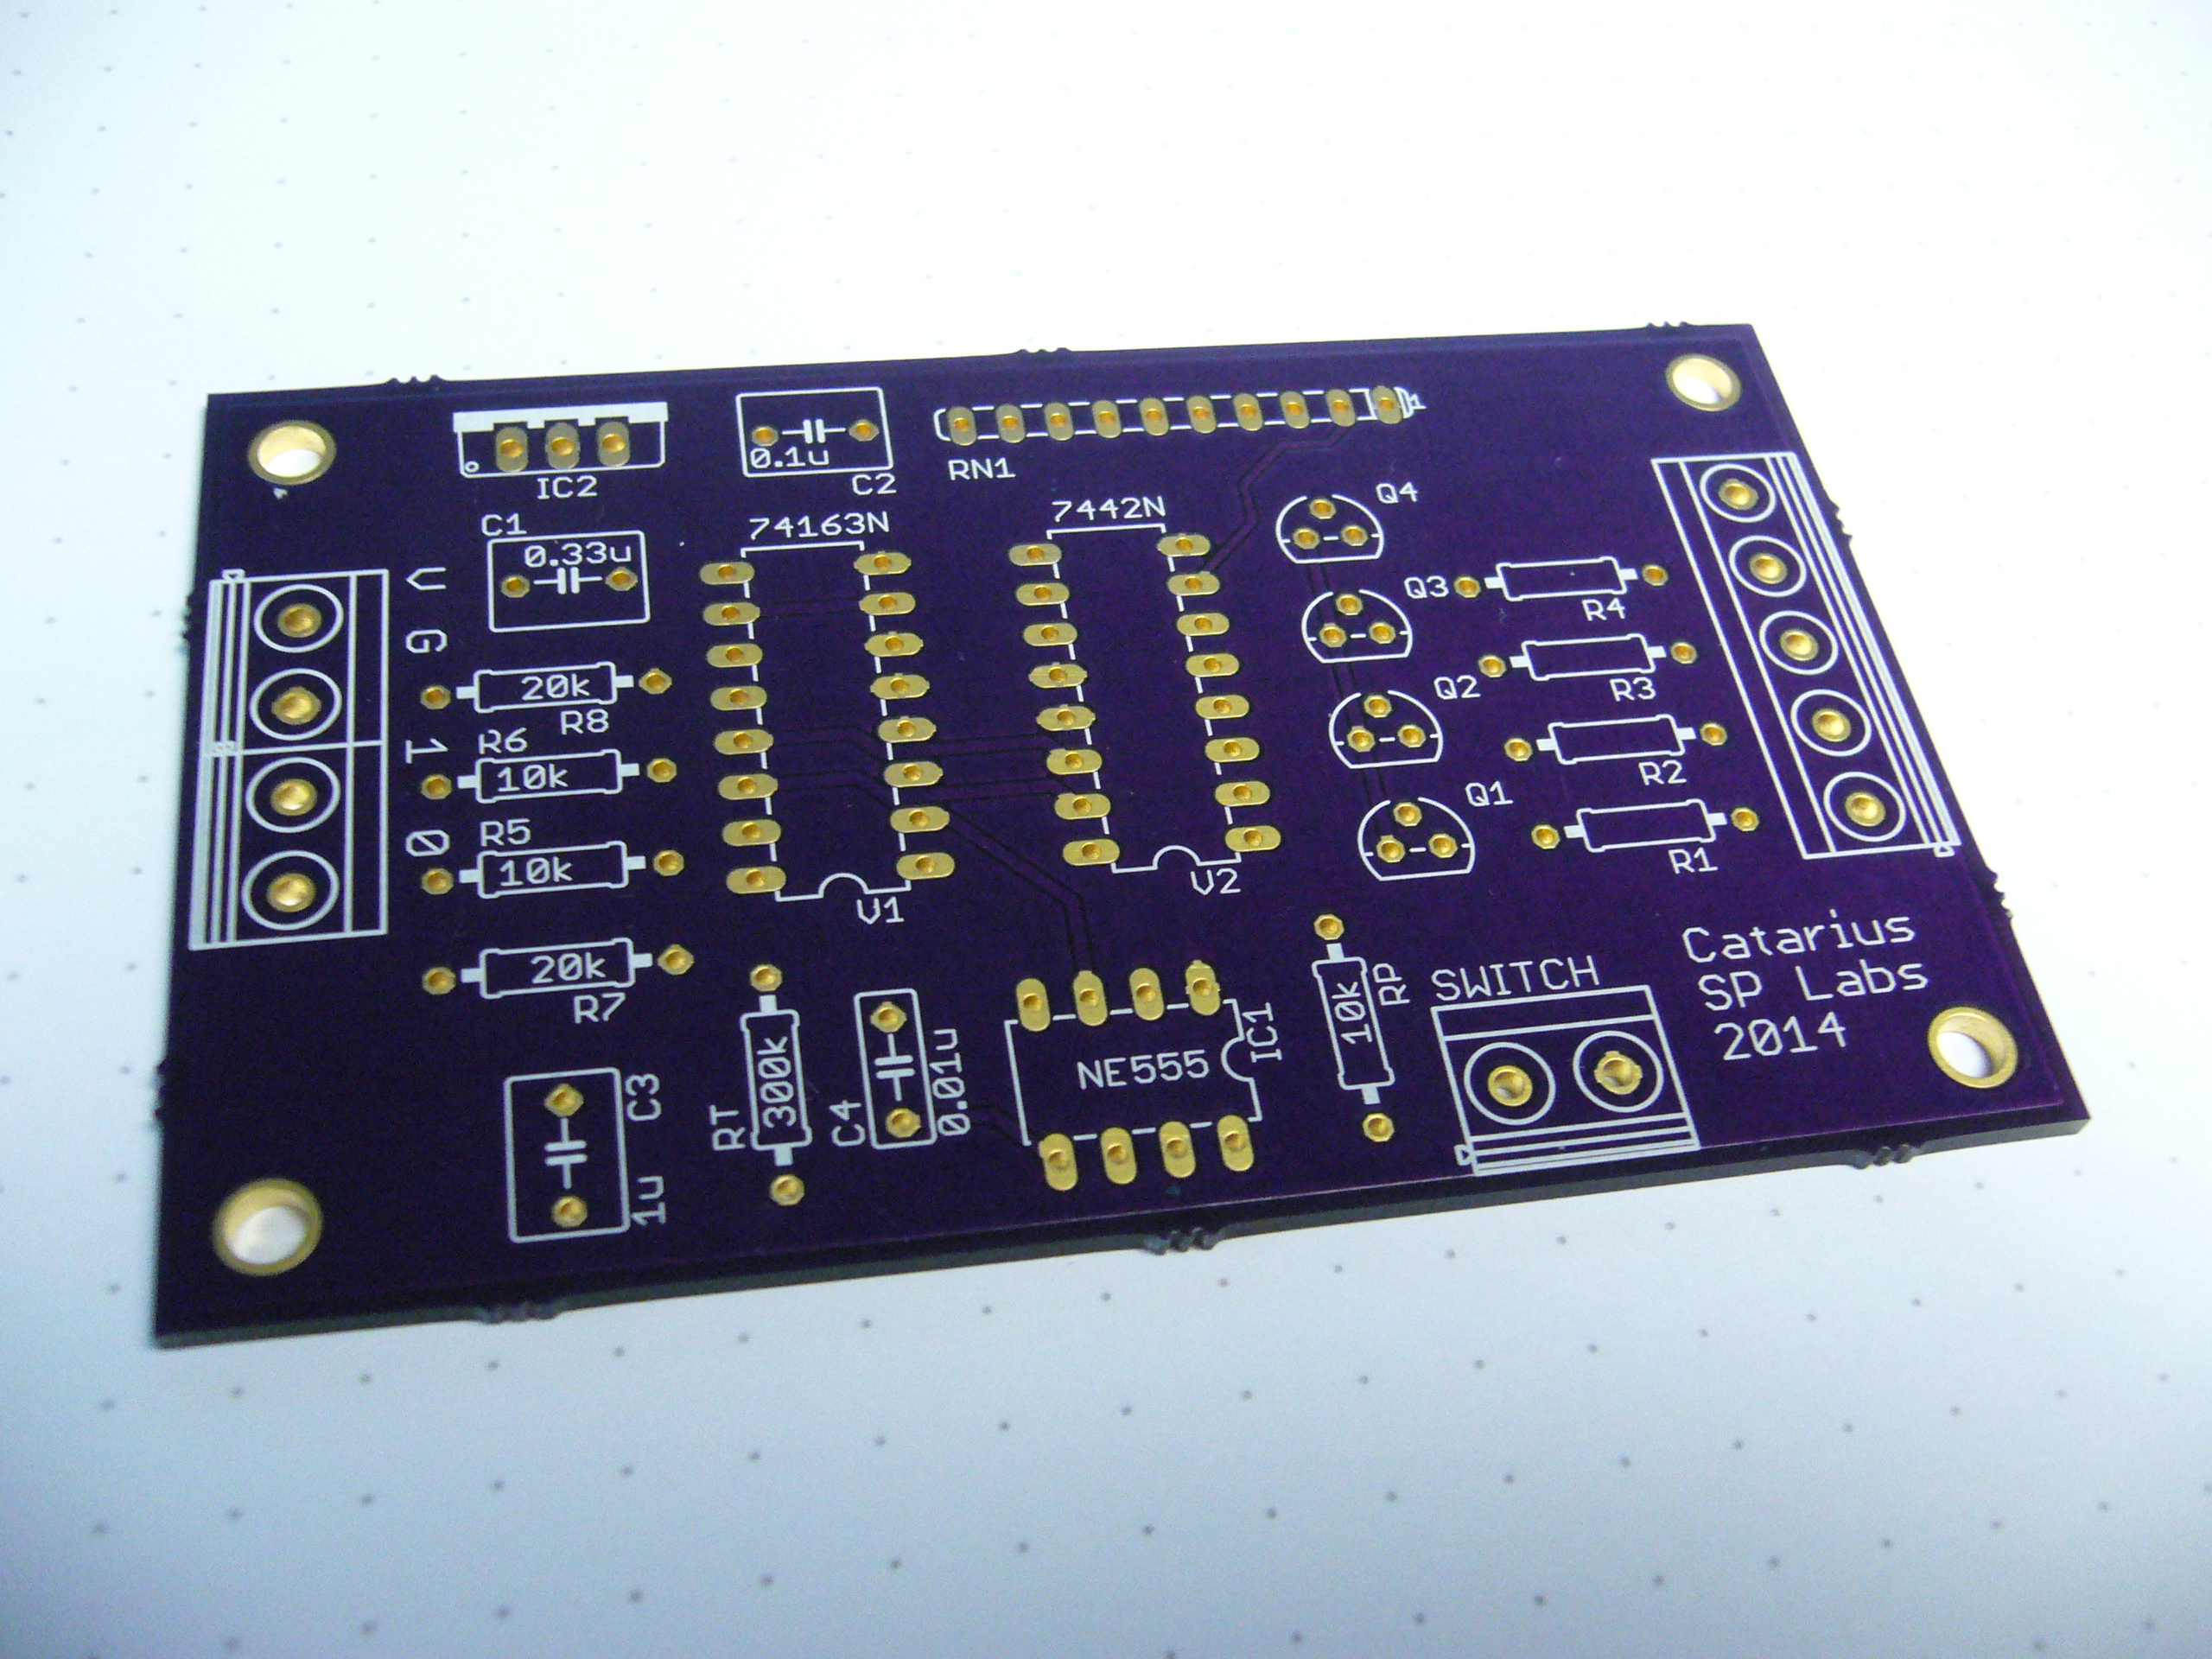
I went with OSH Park as the board manufacturer. My favorite PCB fab house used to be Batch PCB run by SparkFun, but SF sold the division to OSH Park. While OSH Park certainly does a good job, I do have three gripes about them. The first being that the boards are purple and gold instead of the traditional green and silver. A minor offense but I still prefer my internal boards all being the same color. The second gripe is that OSH Park has a minimum order of 3 boards. Again, I recognize that the company needs to make a profit and other PCB companies ask for a minimum of 10. Both of these issues I can look past for the luxury of having a PCB made. But my third and most major gripe with OSH Park is that they do not finish the edges completely. They leave on all the little break points used to separate the individual boards. On my three that I ordered, all three actually had additional pieces of board still left on the edges. They are sharp, hard to file down properly, and just plain bad looking.
Unfortunately, with Batch PCB gone and most other manufacturers requiring a minimum of 10 boards per order, OSH Park was still the best option. And despite my issues, having a PCB is just so nice.
Now that I have the boards, the parts, and all the tools, I should have it all assembled and in the DAC somewhat soon. No promises though.